
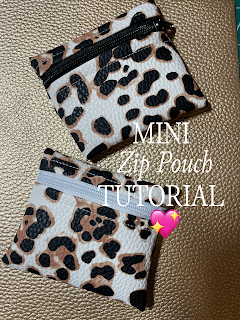
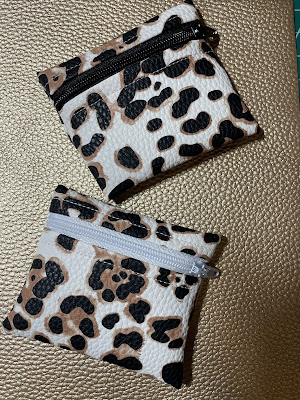
For these pouches I have made them in mini sizes but if you want to size them up for a larger pouch the steps are the same.
All you need is
1 piece of faux leather (mine is 4"x6")
The best patterns for this are ones that have allover or multidirectional patterns, if not your pattern will end upside down on one side.

1 craft zipper
Wonder Clips (you really don't even need them)
That is it
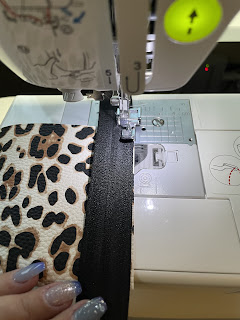
Step 1:
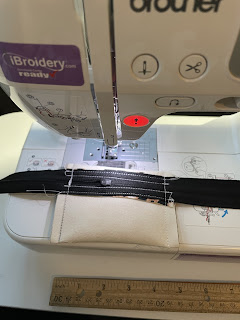
With your faux leather pretty side up, put your zipper tape face down and sew together using your zipper foot.
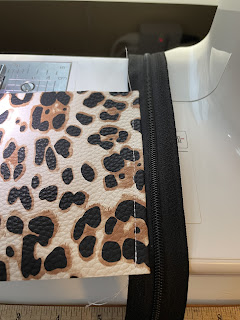
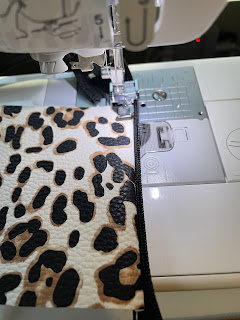
Step 3:
Fold the other raw edge up to your zipper tape and repeat step 1

Step 4:
Open your zipper to turn the project right side out, topstitch down.
Step 6:
Trim excess zipper from both sides, if you want to and have a lighter on hand you can quickly seal the edges where you cut the zipper tape.
Step 7:
Turn project right side out through the zipper and poke out your corners.
You are done!
Happy Sewing!
No comments:
Post a Comment