Saturday, October 1, 2016

New England Patriots C2C Graph

Hi Everyone!!

I'm sorry it's been so long since I've made a post, I try to keep active on my Facebook page, but it seems like I have less and less time for actual blog posts. I'm going to try and change that though, I miss blogging and am going to make that a goal of mine for the next few months!


So, what brings me to this blog post is my NE Pats graph. I'm a loyal NE fan and I wanted to make this to show my pride in my team. I had it for sale in my Etsy shop, but apparently the NFL didn't like my $3.00 listing so it was removed. I am not going to fight them, I used their logo as inspiration, but I did draw the graph. Since I don't have the time or the budget to fight with them over it, I am going to offer it for free here on my blog. I will not upload it to ravelry, as I have a feeling they will remove it as well.


So, here it is. You can download the PDF here. You need to cut out and tape the pages together for it to work. Just an FYI, the pattern is 100x75.

Happy Hooking and GO PATS!

Tuesday, August 9, 2016

Rainbow Dash Blanket and the Magic Knot

As much as I love making graphgans, I hate changing colors. Keeping tons of bobbins from getting tangled and ALL.OF.THE.SEWING. required was enough to give me pause on starting another project. Not to mention, when doing the other C2C blankets I noticed that even after extensive weaving my ends would still come lose and poke out of the blanket. Not what you want to see after all of that hard work!

Then I discovered the magic knot. What is it? Well, it's a great way to join your yarn colors together so that you have NO ENDS TO WEAVE IN. There are a bunch of videos on YouTube to show you how to make the knot but once you do, watch this video because it shows you how to incorporate the magic knot into your project.

So, with all of this in mind I decided to try my hand at another graphgan. Both of my girls chose one for their birthdays, and my little one's was first. She chose Rainbow Dash from My Little Pony. I went back and forth on choosing a particular graph but the winner was this one.

Found this on Pinterest, there are TONS more!
I started at the bottom left corner and getting to that first color change made me super anxious. That first scissor cut felt very scary, but once I got the hang of it it was pretty easy and I really enjoyed making this blanket.


Tuesday, June 14, 2016

Bob the Turtle- aka.Bubble Butt

So here's the turtle that I made with One and Two Company's pattern!

I LOVE how he came out, the instructions were easy to follow and I've started another one of her patterns already.


Although his name was Bob, he was renamed Bubble Butt after a rescue turtle and he is very happy in his new home.

Love him! Can't wait to make more!

Thursday, June 9, 2016

Pattern Talk: Paid Vs. Free

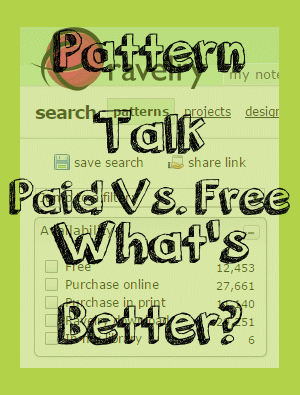
I've been meaning to write about this for awhile. When I ventured out past the world of scarves and blankets I was starting to look at more and more patterns. Before Pinterest came along, I depended mostly on Ravelry (and still do) when I'm looking for a pattern.


Without fail, every time I was searching for an idea, the first thing I would do was check off that little box next to "Free" there was no way I was paying for a pattern. I no longer do this and I'll tell you why. Pattern writing is not easy. For anyone that's attempted it, it can be daunting and there are a lot of little parts that go into it. And while it's not the case every time, there's a reason why some patterns are paid and some are free.

For a pattern to be a "good" pattern it needs to meet certain criteria.
1. Write out all special stitches, notes, and materials needed.
2. Stitch count at the end of each row (very important!!!)
3. Clear, well thought out instructions.

Sometimes when you're doing a stitch or pattern you've done forever it doesn't occur to you that someone looking at it with fresh eyes might have a hard time with it, it's best to spell everything out as clearly as possible.

This isn't to say that there shouldn't be free patterns or that all free patterns are crappy, of course not. But what I'm getting at here is don't write a pattern off because it's not free. If it's for a project you're making for a customer you will more than make your money back. And even if it's for a gift, in my opinion I'd rather pay for a pattern and come out with a finished project I love than something that doesn't look as nice but the pattern was free.
Of course, I do realize that not everyone can afford to pay for patterns and I know that there are TONS of designers that do offer their designs for free. The lesson here is, they are both wonderful options and I'm so grateful to the designing community out there for sharing their creativity. I've only dabbled in the world of pattern making (mostly graphs) and it can be stressful so I truly appreciate all of the hard work, patience and time that goes into making them.

While I'm talking about Paid patterns I would like to shine a spotlight on one designer in particular- One & Two Company who saved me from project hell this week without even knowing it. (Which led me to write this post, lol) I was needing a pattern for a Sea Turtle. I searched Ravelry, Etsy and Pinterest and kept seeing her pattern, I favorited and kept going. Ultimately I chose a free one from Ravelry because, well, it was free and it looked easy enough. Wrong. After I completed the parts for the shell and joined them, the instructions for the rest of the shell were a disaster. No row counts, and the pattern in general was sloppily written and just not good. I decided to cut my losses and went back to my first choice Bob the Turtle. I absolutely ADORE this pattern. It is very well done, lots of illustrations, I would buy all of her patterns if I could afford them. Bob is going to be a birthday gift for a special little girl, so I will be sharing the finished project after he is in his forever home.

There is a sale going on right now on her site! (*I have not been asked or paid to share this information with you*)

“Stock Up for Summer Sale!” and get great discounts!!!
· From 1 to 4 patterns you will get 40% Off
· With 5 or more patterns you will get 50% Off
No Coupon Code needed. June 9 - 11, 2016. Packs not included.
Only on the website:

Lesson learned for me. All patterns are not created equally and don't shy away from the paid ones, while they're not all perfect ( I know mine aren't but I do my best) give them a shot! You might be pleasantly surprised!

What do you think? Do you ever buy patterns? Do you have a pattern wish list like I do?

Happy Crafting!

Monday, May 16, 2016

Legend of Zelda Graph C2C Lap Blanket


Another project is finished! I'm so happy that it's done. My wonderful husband is a big fan of the Legend of Zelda games and I couldn't resist making him this graph.

The finished blanket measures around 40x32 inches and is more for display/lap blanket than to be practical however, I love the finished product and I'm proud of it! It took me awhile due to my struggle with the seemingly endless color changes (weaving in ends took FOREVER!). I had originally planned for a fabric backing but changed my mind once the border was on.


Here is where you can find the original graph I used. I just printed out the image and crossed off each row as I went. I also find it easier to number my rows and columns so its easier to remember what side you're working on.
Work In Progress

For the border I did this one by the crochet crowd. I did 3 rows in blue and one in black to finish it off.

All those ends!! And this is about half of them!
I used mostly Red Heart Super Saver for the colors, except for the background color, Dark grey and the black, they were all Caron One Pound in Sky Blue, Dark Grey and Black.

I am going to be trying a new technique known as the Magic Knot for any future projects with lots of color changes. NO ends to weave in.  Click the link for a video tutorial!

I hope you enjoyed this project, I really did and will be trying out more soon!

Happy Crafting!
Before the border

Thursday, May 12, 2016

Mermaid Tail Blankets

I have been making these mermaid tail blankets for awhile now and I just realized that I never made a post about them!!
I started seeing them circulating on Facebook awhile ago and I love how they can be worn and are so super soft. I decided to go for it and try making one. The pattern I use is from Blue Eyed Bird Creations  it is a paid pattern but I think it is worth it.


The only thing I change in the pattern are the Hook Sizes, I use 15.00mm for the body and 12.00mm for the fin. I can make a child size in about 4 hours so it goes pretty quickly. I've seen other patterns where you use the boucle type yarn for the body and worsted weight yarn for the fin, I like how this one uses the boucle yarn for the whole project. I use Lionbrand's Homespun for mine. I'm not normally a fan of this yarn (if you're using large hooks or needles you're ok) It can be very difficult to see the stitches and if you have to undo any it can fray and become a mess.


I love the pretty color combinations you can come up with. And these blankets are super soft. If you would like to purchase a finished blanket I can make one for you! I have them for sale on my Etsy store.

If you give this pattern a try I would love to see your finished product!
Happy Crafting!

Thursday, April 28, 2016

And the winners are....


a Rafflecopter giveaway

Wednesday, April 20, 2016

Giant Owl Pillow, 100th post and a Giveaway!!!

So first, um, YAY it's my 100th post on this blog! I'm so happy to still be posting and using this blog. It may not be as much as I used to or as much as I'd like but I'm still here! So now that I've gotten that out of the way I will get to the project and at the end of the post I will talk quickly about the giveaway!


Ok, so how adorable is this pillow??? I found the pattern on Repeat Crafter Me a few weeks ago and I fell in love with this project. My youngest daughter's room has an owl theme so it was perfect for her. And of course her older sister wanted one too so they both have one, and BONUS- for the stuffing, instead of using old sheets like the designer did, I used my girls' old receiving blankets! I had a ton of them and they were just sitting in a drawer, So not only is this pillow soft, cuddly and WASHABLE, it's also sentimental because the stuffing is made from their old baby things.  I absolutely love the pattern. It was super easy to follow and each one can be made in a few hours. Yay for owls!
Oh! And I almost forgot, I used giant craft eyes instead of sewing on buttons for the eyes.


Now, on to the giveaway!!!!  I've decided to giveaway not one but TWO prizes to this contest's grand prize winner!

The terms are simple, if you're not a fan already on Facebook, go ahead and "Like my page"
For additional entries you can comment on this blog post and tell me who you would make this project for. The grand prizes are two items that I couldn't have made this project without. A Tally counter, and my favorite thing of all, a Clover Armour Hook. But not just any one, THE one you need to make this pillow, the L/8.00mm size hook.


So The Grand Prize winner will receive
1- LCD Tally counter (color will be random)
1- Clover Armour L/8.00mm Crochet Hook


There will be 3 other winners who will each receive a tally counter!

The contest will run from April 21-April 28. Good Luck and Happy Crafting!

Thursday, April 14, 2016

Emoji Blanket- It's finished!

After I had my time-out with the blanket I decided the best way to join the squares was to keep with the white and whip-stitch them together. It went pretty quickly and I was happy to get it done, Once I attached all of them I did a simple border of just single crochet around in white yellow and black. It's not a very large blanket but I really did enjoy making the different squares and watching it come together. Now that I've finished the blanket I'm happy to say I will definitely be attempting more c2c graphgans in the future!


If you are looking for the graphs you can find them here.

Stay tuned, there will be a GIVEAWAY on the blog very soon for my 100th post!

Monday, March 21, 2016

Crochet C2C Emoji Squares

I have to be honest here. I have not finished this blanket. I started it weeks ago. The squares are done, but every time I try to border/join them I hate how they look and rip them out. It is going to sit in my office for awhile and I will do some other projects until I feel like picking it up again.
But for now here are what the 9 squares look like, I got the graphs (there are written patterns too) from Sarah at Repeat Crafter Me. Hers looks great all done.


Wednesday, February 17, 2016

Easy Doll Diaper FREE Pattern!

Last night my 6 year old was looking for some new diapers for her baby doll. The one she had came with a cute cloth one and when she wants to "change" her, she wanted a new one. The only ones I could find were little disposables or some for LaLa Loopsy dolls. She asked me if I could make her one instead, so I did!


My diaper with the original doll diaper on the right.

The finished diaper before snaps.
This was pretty easy and fits a 14" La Newborn doll. You can easily adjust the gauge to fit a larger doll. You can find the pattern for download here or on Ravelry.
Showing the placement of the snaps.


On my daughter's doll Elsa (of course!)

The snap kit can be purchased here.

Tuesday, January 26, 2016

2016 Temperature Blanket

Hi Everyone!! I'm sure you've seen the tons of posts on Pinterest and Facebook about making a temperature blanket!

https://www.etsy.com/listing/262182198/clearance-sale-crochet-blanket-pattern?ref=shop_home_feat_2
*Not my work ©ChocolateDogStudio on Etsy

I've tried making one of these before and lost my interest so I never finished it. BUT this year I think I'm really going to do it.


One example of your yarn choices.
This year is special, why you ask? because it's a LEAP YEAR, which means this year has an even number of days! Perfect for a Corner to Corner blanket!! What my plan is is to use the chart below (I'm using Red Heart Super Saver and I liked that there is a wider range of colors in this chart) and create my blanket, Increasing from now until June, and then decreasing for the rest of the year.
I am also not great with doing *1 row a day* type projects, so I'm keeping a Temperature log in my datebook as a reference, noting the sky conditions (sunny, cloudy, rain, snow) the temperature and also the yarn color. I was originally wanting to make a C2C square for each month and join them at the end of the year, but because the months are all not equal with days they wouldn't be the same size and I thought it would look weird. So. That's my plan! I'm going to purchase some of the wintery colors now and get started!


This is the chart I'm using! (i will add stitches of rain and snow instead of the whole row)

Not into the idea of a Temperature blanket? How about a mood blanket? You could use the same principle ( a row a day) and use a different color based on your mood for the day. No matter what project you choose it should be a fun way to work on your crochet for the whole year!


http://crochetime.net/2013/12/30/crochet-mood-blanket-2014/

If you decide to make one please feel free to share it with me!
Happy Crafting!

Thursday, January 21, 2016

Double Layer Braided Cowl

This gorgeous cowl has been making the rounds on Facebook all week. Once I saw it I decided I had to give it a shot.

I love how this came out! It was so easy to make and I enjoyed picking out an ombré color scheme to show off the braiding. The best part is it's a free pattern! There is also a video tutorial for the new stitches. 
http://www.ravelry.com/patterns/library/double-layered-braided-cowl

Happy Hooking!

Tuesday, January 19, 2016

WIP (Work In Progress) FREE Printable!

If you're like me and have a short crafting attention span, then you may get some use out of this printable! It's a FREE downloadable pdf with two WIPs per sheet. You can print them on cardstock so they're a little more durable.


What I do is put my WIP in a clear bag and slip this card right in front so my projects are all nice and organized.

I've made one for knitting and one for crochet.

I hope you like them!


Monday, January 11, 2016

Chunky Chevron Blanket


I have been wanting to make this blanket for months, and I finally did! I love how it came out, I adore everything Chevron and was so excited to do this project. It worked up super fast (a nice weekend project) I'm planning on making another one and doubling the chain so it's bigger. This was a free pattern from Lion Brand (you need to have an account with Lion Brand to view it but the pattern is free!)


The only things I did differently was change the hook from a 10.00mm to a 12.00mm. (Best Hooks Ever!!) I also added a border. The yarn I used was Bernat Blanket Yarn in Light Teal, Dark Grey and Sweet Cream from the baby line. The link shows a 150g ball which I've only seen the large ones in stores ($9.99 each) for this blanket I used a little over 1 skein of the teal and grey and less than one of the sweet cream.

The size is a big lapgahn, Perfect for cozying up on the couch with the fireplace roaring, and of course, a new project on your hook!