Tuesday, March 19, 2013

Hat donation deadline

The first group of hats will be sent the first week in April. So please have your donations to me by Easter (3/31).

If you can't make this round, no worries there will be more!

Thank you all for your support!

Sunday, March 10, 2013

Crochet Cupcake Earflap Hat

Inspired by the cupcake blanket I made I wanted to continue the theme and make a cupcake hat for my 3 year old.


Basically what I did was follow a basic pattern for a earflap hat, and I sewed on the cupcake applique.

I think it came out really cute, the only thing I will do differently next time is make the applique smaller so it doesn't take up so much of the hat.
But besides that, I love it.

The entire hat is made out of 100% cotton yarn, now that spring is approaching (YAY!) I didn't want her to sweat wearing it. And of course, it's washable, so what's better than that with a 3 year old.

Here's what I did: (This pattern is from Repeat Crafter Me, I use this base for all of my hats.)

Hat in toddler/preschool size:

Magic Ring, Chain 2, 9 DC in magic ring, join to first DC, ch 2
Round 2: 2 DC in each around, join to first DC, ch 2 (18 DC)
Round 3: 2 DC, DC in next, repeat around, join, ch 2 (27 DC)
Round 4: 2 DC, DC in next 2, repeat around, join, ch 2 (36 DC)
Round 5: 2 DC, DC in next 3, repeat around, join, ch 2 (45 DC)
Round 6: 2 DC, DC in next 4, repeat around, join, ch 2 (54 DC)
Round 7: DC around (54 DC)
Change color, join and ch 2
Round 8-12: DC around (54 DC) fasten off and find a point to make your earflaps (i like to do mine on the sides so the seam is in the back)

Earflap 1:
Row 1: Chain 2, HDC 12, chain 2, turn
Row 2: HDC decrease, HDC in next 8, HDC decrease, chain 2, turn
Row 3: HDC across, chain 2, turn (10 HDC)
Row 4: HDC decrease, HDC in next 6, HDC decrease, chain 2, turn
Row 5: HDC across, chain 2, turn (8 HDC)
Row 6: HDC decrease, HDC in next 4, HDC decrease, chain 2, turn
Row 7: HDC across, chain 2, turn (6 HDC)
Row 8: HDC decrease, HDC in next 2, HDC decrease, chain 2, turn
Row 9: 2 HDC decreases, chain 2, turn
Row 10: HDC decrease, fasten off leaving long tail.

Earflap 2:
Leaving 23 stitches along the front for child size hat, 25 stitches along the front for adult size hat...
Row 1: Chain 2, HDC 12, chain 2, turn
Row 2: HDC decrease, HDC in next 8, HDC decrease, chain 2, turn
Row 3: HDC across, chain 2, turn (10 HDC)
Row 4: HDC decrease, HDC in next 6, HDC decrease, chain 2, turn
Row 5: HDC across, chain 2, turn (8 HDC)
Row 6: HDC decrease, HDC in next 4, HDC decrease, chain 2, turn
Row 7: HDC across, chain 2, turn (6 HDC)
Row 8: HDC decrease, HDC in next 2, HDC decrease, chain 2, turn
Row 9: 2 HDC decreases, chain 2, turn
Row 10: HDC decrease, chain 1, turn
Continue to SC around the entire hat. Join to first SC and fasten off, leaving long tail.
 
Cupcake Applique: (I fould this pattern on Louie's Loops and it's supposed to be for coasters, but I adapted it for the hat and made some changes to the frosting part, it was confusing and didn't look right to me)
 
Materials:
(basically any 100% cotton works)
-Needle to sew in ends with
Abbreviations:
-SL.ST = Slip Stitch
-SC = Single Crochet
-HDC = Half Double Crochet
-DC = Double Crochet
-Ch = Chain
-Rnd = Round
In color A (brown) Ch 10
Rnd 1: Sc 8, turn.
Rnd 2: ch 1, sc 8 in back stitches
Rnd 3 – 14: Repeat x 12 (14 total)
Change to color B
Rnd 15: ch 1, Sc 1 in the sides of each row 14, turn. [Don’t cut, Leave color B attached] (14)
Change to color C
Rnd 16: ch 1, sc 2 in first, sc 1 in next 12, sc 2 in next, turn. (16)
Rnd 17: Don’t ch, skip first st, sc 1 in next 14, stop one early, turn. (14)
Rnd 18: ch 1, sc 1 in each, turn. (14)
Rnd 19: Don’t ch, skip first st, sc 1 in next 12, stop one early, turn. (12)
Rnd 20: ch 1, sc 1 in each, turn. (12)
Rnd 21: Repeat (12)
Rnd 22: Don’t ch, skip first st, sc 1 in each, turn. (11)
Rnd 23: Repeat (10)
Rnd 24: Repeat, cut and tie off. (9)
*For Cherry, count in three stitches from top, pull through in the fourth st from end on Rnd 24…
Rnd 25: sc 1 in fourth from the end and next two, turn. (3)
Rnd 26: Don’t ch, skip first st, sc 1 in next 2, turn. (2)
Rnd 27: Don’t ch, skip first st, sc 1 in the last st, cut and tie off. (1)
*For lining
Rnd 28: Using the color B left off and uncut from Rnd 15, pull one through the end of Rnd 15 and sc 1 in each Rnd and st around the piece, cut and tie off, sew the remainders into the piece. (≈59)
So that is how I did this hat. I've found that you can make a basic hat shape and do anything with it, animal faces, appliques, bows, pom poms, anything at all. I'm having lots of fun coming up with different combinations!

Thursday, February 28, 2013

Cupcake Baby Blanket

I saw this pattern on pinterest awhile ago and wanted to make a cute blanket for spawn #2. Since we don't know what we're having yet I wanted it to be gender neutral, although I confess, even after adding green to the border it's still pretty girly.

I made the blanket a lot smaller than it was originally supposed to be, but oh well, it's for an infant.  My daughter never really used the blankets I made her before she was born and who am I kidding, I wanted to try a new crochet pattern.

The way the pattern is written is very confusing at first, but once you get the hang of it it's not so bad. Because I would always fall asleep around 9pm it did take me a while to finish but, it's done!
 
It's hard to see because of how I took the photo but every 2 rows makes up some cupcakes. I really enjoyed it and am trying to think of other ways to use the cupcake motif in a pattern.

Updated: Here's a better picture!

Tuesday, February 26, 2013

Calling all yarnworkers! You are needed!

That means you! If you love to knit or crochet and have any extra yarn and extra time, please take a minute to read this post. I have mentioned before how I would like to get some donations together to send to my area's local hospitals. The nurseries and NICUs are in need of hats and blankets for the little ones and their parents.
When I had my daughter I was thrilled to have a keepsake besides her hospital bracelet. Now that I am getting ready to have my second child this summer it has gotten me thinking about getting a serious donation together.

I'm looking for all sizes, (from small preemie to a larger full term baby) all colors, all patterns, (although keep in mind, these are small infants, they don't really need fancy earflap hats) plus the goal here is to be able to send off as many as you can, so keeping the pattern simple will help.
You can also feel free to make very small "angel" hats for the parents of babies who are born too soon or born still and do not get to go home. In addition to the hats, small granny square memory blankets are also needed, they can be a great source of comfort for grieving parents.

Here are some links with patterns/sizing help:

http://www.themakeyourownzone.com/2011/03/knitting-newborn-hats-for-hospitals.html

http://www.bevscountrycottage.com/hats-hats-hats.html

http://www.oodles-4-noodles.com/2011/08/crocheting-hats-for-preemies-tutorial.html

http://www.miracleshappen.us/patterns/

http://www.knittingforcharity.org/

If you have hats/blankets to donate please contact me at crafttacular@hotmail.com  and I will tell you where to send them. Any help you can offer is greatly appreciated.

*This will be an ongoing donation, so there is no set deadline, I will post updates on when I will be sending a shipment out*

Thursday, February 21, 2013

Auto Wallet Makeover

I just got a new car and while I was going through all of my stuff, I pulled out my old plain auto wallet. You know, that thing that you only pull out when you're asked to show your licence and registration? well mine was the standard black bi fold wallet with Velcro, so I decided to spruce it up. It literally took less than 5 minutes. and it's not perfect but it looks a hell of a lot better!

All you need is your boring-old auto wallet (journal, anything else that needs a face lift)
washi tape - I got mine on sale at Michael's so it was only a few $ and it's a pretty big roll so I'll have it for awhile!

the only other step you might want to do is clean off the wallet with a little Windex to make sure that the tape sticks well. other than that, get to it!


 Roll on your tape, line up the other rows, done.

Monday, February 11, 2013

Cookie Jar Re-do


For this project I already had all of my materials

A blank cookie jar (or if you want to cover over and old one with an outdated picture/design, go for it!)
Scrapbook paper (picture, comic strip, or anything really)
Mod Podge (still using the martha brand but i'm not that crazy about it)
Letter Stickers (optional)


I only chose to do a section of my jar because I liked having most of it still plain since I chose such a busy piece of scrapbook paper.
Make sure your cookie jar is clean and you can begin!

Step one: Cut out your paper/artwork
Step 2: Put Mod Podge on the back of your paper and on your cookie jar, stick it on!
Let it dry for a few hours
Step 3: do at least 2 coats of Mod Podge, let dry for a few hours between coats
Step 4 (optional): Add stickers and Mod Podge over it to secure


In hindsight I probably should've left the stickers off but I like them anyway!

Have fun!

Monday, January 21, 2013

Loom Knit Fingerless Gloves


Loom Knit Fingerless Gloves

Materials:
Small (blue) loom
Bulky yarn (or double stranded worsted weight yarn)
Tapestry needle
Loom tool

*Before you cast on you may want to use stitch markers (or do what I do and just write on your loom with a sharpie) to distinguish your 4 pegs that will become your thumb hole. * 

Seriously the easiest pattern ever, these gloves work up super quick and if you use the bulky yarn they’re very warm!

Cast on all pegs.

Knit around for 20 rows

On row 21, make thumb hole (use technique described in the Cabled Dog Sweater post) but just make one, duh!

Knit around for 6 more rows

Super stretchy bind off (also mentioned in great detail in the Cabled Dog Sweater post)

That’s it, you’re done!


PDF download here.

Wednesday, January 16, 2013

DIY Superhero Canvas

I don't have a son, but I do have a husband that loves his superheroes. So, for this Christmas I decided to lend some decoration to his computer area. I was looking to purchase some nice prints but after seeing how much money they cost I realized that I could make them myself. Not only did I save a ton of $$ I had fun making these and I would much rather give a hand made gift!

Materials:

Fabric-
For the Superman I found a t-shirt at Walmart for $7.50
The Marvel comic pages were from Jo-Ann, since I needed so little 14" but when you get it off the spool it's 47" long, so I was able to cut enough fabric to cover two 10" canvases. This cost me $1.94 after using a 50% off coupon!
Canvases- I used a 12" for the superman and two 10" for the marvel. Obvioulsy you can use whatever sizes you want!
Staple gun
Hardware for hanging on the wall (optional) you could always use an easel for display!

Stretch your fabric over the canvas and staple away. Just be careful with the corners! I cut mine like I'm wrapping a present so your corners are nice and neat!

That's it!
A super fast- personalized project for any occasion!


Thursday, January 10, 2013

I'm still here

i recently found out that my husband and i are expecting our second child so things have been a little hectic around here (and i've been very tired!) but i'm working on some posts and new projects, hopefully they will be up soon!

Friday, December 7, 2012

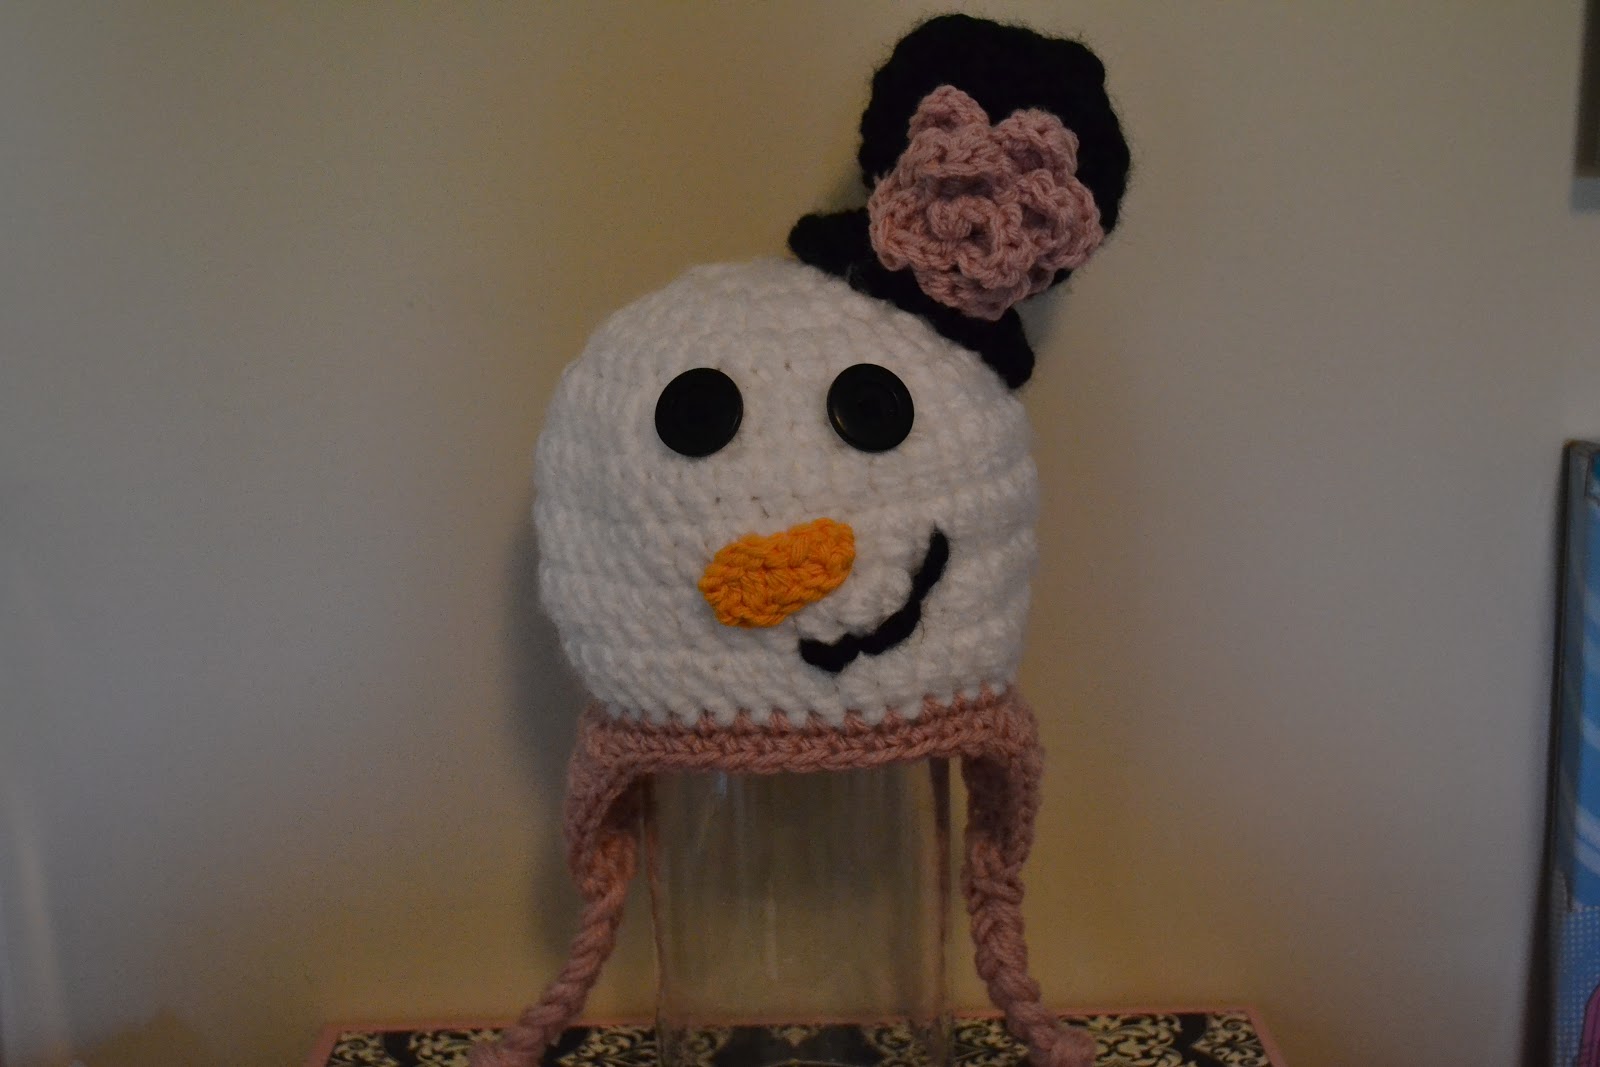
Snowman Hats!

OMG I'm obsessed with these hats. I found the pattern here. The only thing I did differently was add the crochet roses from my yarn wreath post to accent the adorable top hat.