Showing posts with label knitting. Show all posts

Thursday, November 21, 2013

Loom Knit Red Sox Dog Sweater


Loom Knit Red Sox Dog Sweater


This sweater was made on the Red Knifty Knitter Loom. And the Red Sox “B” is a crochet applique. This dog is 11” from neck to tail and this fit perfectly.

When you are knitting a project like this one that requires leg holes before you start you should mark on your loom where your leg hole stitches will be. I use 4 stitches as a guide and I center them off of the starting peg. I mark mine by writing on my loom with sharpie but you can easily use stitch markers instead.


Materials:

Super bulky yarn in grey, and red

Bulky yarn in white for outline

Red Knifty Knitter loom

Loom tool

Crochet hooks 5.5mm (for “B”) and 4.5mm (for outline)

Tapestry Needle


Pattern:


E-wrap cast on
E-wrap for 10 rows
Make brim (if you need help with this there are tons of YouTube videos)
Starting with row 11, e-wrap around to last peg, do not join! For the next row e-wrap in the opposite direction, this will make an opening at the bottom of the sweater.
Continue alternating e-wrap for 10 more rows
Row 21- make leg holes 


(This diagram is for the small blue loom but the same principal applies, also ignore the part about the cables that was for a different sweater)

I'm going to name the pegs A and B, A being the peg on the left and B on the right. Take B, put it on peg A, so now you have two loops, knit off stitch, place back on peg B. it sounds complicated but it's really easy. Then continue for the next 3 pegs until you have 4 empty pegs. After you have your 4 empty pegs, wrap your working yarn around them as a foundation for the next row and continue on knitting around the loom again until you get to your next leg hole pegs, repeat cast off of 4 stitches, and finish the row.

After the leg holes are made, continue with the e-wrap and turn pattern for 25 more rows (a total of 46 rows- this includes collar rows)
Cast off the same way you made the leg holes, leave a 6” tail. You will have a loop left, just weave your tail yarn through the loop and secure into the inside of the sweater. Now turn sweater inside out and sew up the seam ½ inch below the leg holes to the collar to close. Weave in end.
That’s it for the main sweater. If you would like to add the applique, please follow this pattern and sew onto sweater.

Happy Knitting!

*You may sell items from my patterns, all I ask is that you credit my blog*


Wednesday, October 24, 2012

Knit Poncho


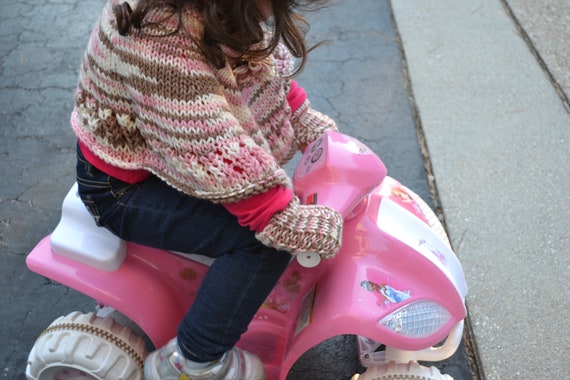
I made this poncho for my daughter over a year ago and she still loves to wear it. She can also wear it as a skirt if she really wants to. It's adorable and doesn't take too long to make.

I also made matching fingerless gloves to match. Between the two projects I used less than one skein of yarn. I used Loops & Threads Impeccable worsted weight yarn. It's a pretty soft yarn to begin with but once it's washed, it's super soft.

Monday, October 22, 2012

Candy Corn Costume


Look at this adorable little boy!

I've seen a version of this on Pinterest and no matter how hard I tried I coudn't find a pattern for it. So I made one. Knitting this up only took a couple of days and since I used cotton yarn along with the eyelash it ended up being super warm.

I didn't take exact measurements of this but since it is like a coccoon you could make it a tad bigger or smaller and it could've fit on my almost 3 year old as a dress.

The body of the costume was actually very easy, and the hat I modified from this pattern on Ravelry. I used less decrease rounds and didn't have as severe a point, but if you want a really pointy hat, this pattern would do. I also cast on fewer stitches since it was for an infant.

Materials:
1 ball each of yellow, orange and white cotton yarn
1 ball each of yellow, orange and white eyelash yarn (white is fun fur, yellow and orange are lash max)
size 15 circular needles
tapestry needle.

Both pieces are worked with one strand of cotton worsted weight yarn and one strand of eyelash yarn.

Body:
Cast on 40 sts in yellow, join in round.
Knit for 25 rounds
Switch to orange
Knit for 20 rounds (if you don't want tank top sleeves, knit the extra 5 rows and bid off, if you want sleeves, continue)

Straps:
Cast off 13 sts, knit 4 sts, CO 5, knit 4 sts, CO rest of stitches.

P1, K1, P1, K1 on first strap
Place 2nd group of 4 sts on stitch holder.

go back to first strap and repeat P1, K1, P1, K1 for 15 more rows
Bind off

Pick up second group of stitches for straps and repeat
P1, K1, P1, K1 for 16 rows total.
Bind off

Sew straps to body, or secure with buttons

Optional:
Sew up bottom

Wednesday, August 8, 2012

Cabled Dog Sweater

Before I had my daughter I was obsessed with dressing up my dog, yes I'm one of those people. Although, can you blame me she is adorable.
Yes, she had her own play gym too. ::sigh::
So naturally, i have a whole wardrobe for her, but with everything i've bought her every sweater has been too short. She's very long and lean unlike myself. so i decided to try making a dog sweater. once i figured it out it was pretty easy. she's tiny 4lbs 3oz so i used the small 24 peg loom, and some bulky yarn.

Materials:

  • yarn, either use bulky or do two strands of medium/worsted weight yarn.
  • cable needle (if you're doing cables, if not no biggie)
  • size loom for your doggie, like i said, my dog is tiny, and this sweater probably wouldn't fit a dog much bigger than her but the pattern can be adjusted to fit any size loom!
  • loom tool
  • tapestry needle
  • stitch markers
 This pattern is for a small/teacup dog, so everything is little!

Before you cast on look at your loom. Put the starting peg in front of you, now counting the two middle pegs go out an additional 4 pegs on each side. These 4 pegs on either side of the starting peg will be your leg holes.
Please forgive my horrible diagram, but hopefully it explains it well enough.
Click it to make it bigger!

Cast on normally and knit (all in e-wrap if no cable) if you are doing a cable down the back you need to add a purl stitch before and after your cable stitches. so on the diagram above, the stitch marker would go on the 1st and 4th peg of the cable, and make your purl stitch before and after these.
so, you've cast on and have about 4 inches done. now it's time to make the leg holes.
to do this knit your first two stitches as normal, then once you get to the first stitch that you want to cast off, follow this method.
i'm going to name the pegs A and B, A being the peg on the left and B on the right. take B, put it on peg A, so now you have two loops, knit off stitch, place back on peg B. it sounds complicated but it's really easy. then continue for the next 3 pegs until you have 4 empty pegs. after you have your 4 empty pegs, wrap your working yarn around them as a foundation for the next row and continue on knitting around the loom again until you have 6 pegs to go, repeat cast off of 4 stitches, knit last two pegs.
The round after the leg holes, knit all stitches!
keep knitting until you feel the sweater is long enough.

But wait, you mentioned cables right??
--ah yes, cables.
If you are doing cables i suggest doing them about every 6 rows. and the method i use to cable is pretty simple.

It starts with the row before, when you get to your stitch markers make your wraps for the cable stitches pretty loose, finish out the row.
Once you reach your cable stiches in the cable row (i do a 4 stitch right cross cable, you can do left if you want or add more stitches, but it does get VERY tight to work with, so i found that 4 stitches is plenty and it looks nice).
take your cable needle and pick off the two right stitches starting with the most right, place in back of the pegs.
 move over the two left stitches onto the two right pegs, placing the more right of the pegs on the far right peg, followed by the left peg.
now take your stitches on the cable needle and put them on the empty pegs, knit all 4 stitches and keep going to finish the round.

hopefully i explained that well, i feel like i was speaking another language. i'm going to try and put a video tutorial together for these methods as my diagram drawing leaves something to be desired.

Almost as important as everything else is the bind off. you may be tempted to use the bind off method i described above to finish your project but don't i tell you! it has almost no stretch and your dog will hate you more than he/she will for putting it on them in the first place.

The method i used is called the super stretchy bind off, and it is exactly as it sounds, super stretchy, it's wonderful and i'm actually not scared of most loomed projects now because of finding it.

in a nutshell the super stretchy bind off is very easy. measure your working yarn to about 3 times the length of your loom, add a little extra and cut it off, thread it through your tapestry needle.

skipping peg one, put your needle up through peg 2 and keeping the yarn infront of peg 1 so now there are 2 strands of yarn on peg 1, pull the yarn taught, now, go back and put your needle down through the top of peg 1 behind both strands of yarn. skip peg 3, go up peg 4, and back down through peg 3, all the way across until you've reached the last peg, and work back over peg 1 to make sure you have a good closure. now, be brave and pull all of the work off your loom. i'll wait...

see! isn't it pretty? and stretchy?!? good. now weave in your ends and you're done!

The final product on my beautiful model Layla

She was too ashamed to show her face

she seriously wouldn't look at me, i took at least 20 pictures

that about sums it up, no?


Friday, June 22, 2012

Knit Baby Set


I was commissioned to make a baby hat for a very dear friend of mine. She asked only for the hat but of course I coulnd't resist going a step further (or two) and making matching booties and a blanket.


Yarn: Patons Beehive Baby Chunky in Violet
The hat was made using this pattern from Ravelry. The Blanket was made using this pattern. And the pattern for the booties is here.

The blanket or booties didn't call for the ribbon but I wanted them to match the hat so I went ahead and added it. I didn't get the greatest pic but the yarn is super soft and I'm glad I got extra!

Friday, June 1, 2012

Knit iPad2 Case


I realize that my photography skills, or lack therof are leaving a lot to be desired but it's the best shot i could get of this with my camera phone. This was knit on a round loom (mine is the Orange loom from Boye with 36 pegs) The knifty knitter version is green.

This is the Pattern

Use bulky yarn, or use double strand worsted weight yarn.

E-Wrap for 12"
Cast off
Sew up one end for the bottom.
Take the top of your sleeve, crease it in half, put half of the stitches back on the loom, and continue to e-wrap a flat piece (left to right then right to left, or honestly it doesn't matter which direction you go, whatever you're comfortable with)
Do this for another 6"
Bind off

You are done!!

Now, if you don't want to cast the whole thing off and re-do 1/2 stitches you can just cast off half of the stitches, cut your yarn to weave in and continue making the flap from there. I might try this next time as I had a small issue with the stitches lining up with the rest of the work.
Obviously you can change the pattern and knit the whole thing instead of e-wrapping, finishing with a button, or adding in cables, which will be my next attempt. Overall it's a great way to get familiar with loom knitting and it's something else do make besides a hat!

If you like this project please feel free to Pin it!

Happy Knitting!

Saturday, April 21, 2012

Say hello to "Buster"

That's what I've named the bear I just finished knitting for The Mother Bear Project.
Not perfect by any means but I'm excited to make more and improve my work! The embroidery was definitely harder than I expected it to be but I will be using more YouTube videos for help next time!
Without any more suspense, here's Buster!

Monday, April 16, 2012

The Mother Bear Project

I've been knitting for close to 20 years (yes i'm only 28 but I learned quick thanks to my amazing Grandma) and before recently all I ever managed to turn out were scarves and small blankets.
I've been trying to expand my knitting horizons and while doing some surfing on Facebook I came across the Mother Bear Project. MBP is a non profit organization that sends hand knitted and crocheted bears to children in Africa that have been affected by HIV/AIDS.
So I decided to do my part to help and I ordered my kit, which came very quickly I might add!
In the envelope there was a set of knitting needles, yarn, and a pattern, which even for a scardey cat-I'm-only-sticking-to-scarves knitter like me I found the pattern easy to follow.
After another night or two (after I figure out how to sew everything up!) I should be finished and I'll post the finished product here. I can't wait to finish it and start making more bears!
As a bonus I'm impressed with myself that I'm making something more involved and it's given me confidence to try new things!
So if any knitters out there are looking for a project that goes relatively quickly and is also for a great cause, give the Mother Bear Project a try!

Tuesday, February 14, 2012

Cupcake Hat

I've seen many techiques for making a cupcake hat, but by far the easiest (and quickest) i've found is the loom knit pattern at This Mama Knits. Instead of using Caron Simply Soft, I have been using the Michael's store brand yarn Loops & Threads Impeccable, in Espresso and Light Pink. For the cherry i just used some scrap bulky yarn I had laying around.

In order to do them on the round looms properly you need to have one that has an even number of pegs (because of the ribbing). The only looms I've seen with this is the Round Loom Set by Boye < that link takes you to a store where the set is $21.95, but I got mine at Walmart for $13!
This hat also sizes pretty small, the smallest loom is best for preemies, with the next size for infants, toddlers, and older kids/small headed adults. the biggest loom should fit an average size adult head.
Here is a picture of a completed hat: